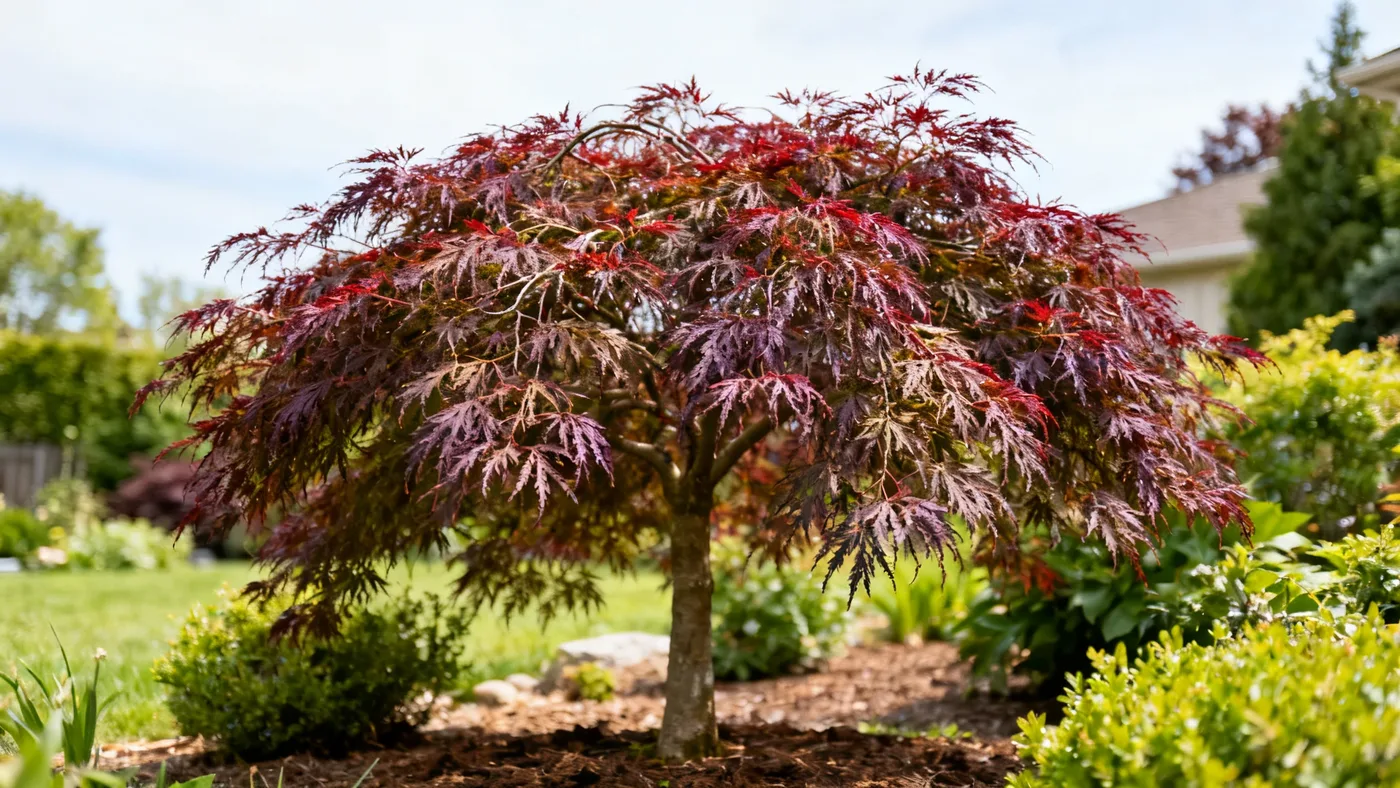
Best Soil for Crimson Queen Japanese Maple: pH and Drainage
Crimson Queen Japanese Maple is as particular about its soil as it is striking in appearance. Getting the soil right at planting time sets the tree up for decades of vigorous growth and brilliant fall color. Unlike trees that can tolerate poor soil, Crimson Queen demands rich, well-drained loam with consistent moisture, and it will show you immediately if the conditions are wrong through leaf scorch, root rot, or stunted growth.
This guide walks you through exactly what soil your Crimson Queen needs, how to test and amend your existing soil, and what to expect once you've created the right conditions.
Why Soil Matters for Crimson Queen Japanese Maple
The finely dissected, lacy foliage that makes Crimson Queen so prized is also a sign of a tree with specific needs. This cultivar is not drought-tolerant and does not bounce back from dry spells quickly. Its shallow, fibrous root system works best in soil that holds moisture evenly but never stays soggy. Without the right soil structure, you are fighting an uphill battle against leaf scorch, root diseases, and slow growth.
Soil is your first line of defense. Once you get it right, watering, fertilizing, and pruning all become easier. The tree stops sending distress signals and grows the way you expect it to.
What Kind of Soil Does Crimson Queen Maple Need
Crimson Queen Japanese Maple thrives in rich, well-drained loam high in organic matter. This is the non-negotiable foundation. Loam is the soil type that balances clay, silt, and sand, giving you both water retention and airflow at the roots. Pure clay compacts and holds water too long. Pure sand drains too fast. Loam finds the middle ground.
The "high in organic matter" part is what many gardeners skip, and it costs them. Organic matter (compost, aged bark, peat moss, or well-rotted pine needles) does two things: it keeps the soil from compacting over time, and it buffers moisture so the tree gets steady water availability between rainfall or irrigation.
When you amend your soil before planting, you are creating an environment that mimics the forest floors where Japanese maples grow naturally, underneath larger trees with plenty of leaf litter and shade.
Soil pH for Japanese Maple
Crimson Queen Japanese Maple prefers slightly acidic to neutral soil, with an ideal pH range of 5.5 to 6.5. This is important because nutrient availability shifts dramatically outside this range. At higher pH (above 7, alkaline soil), the tree can develop iron chlorosis, a yellowing of new leaves while the veins stay green, even if iron is present in the soil.
Test your soil before amending. A basic soil test kit from any garden center will give you a pH reading. If your soil is above 6.5, you can lower it by working in sulfur, though this takes time and must be done 6 to 12 months before planting for best results. If your soil is below 5.5, add lime, but do this cautiously because it is harder to reverse than acidifying.
Most home soils in temperate regions fall in or near the target range, so if you are starting from typical garden soil and adding organic matter, you are likely already close. Test first, then adjust only if needed.
Drainage Requirements and Why They Matter
"Well-drained" does not mean dry. It means water moves through the soil and does not pool around the roots. Standing water suffocates roots and invites root rot and verticillium wilt, both serious threats to Japanese maple. At the same time, Crimson Queen is not drought-tolerant once established, so the soil must retain some moisture between waterings.
The best way to test drainage is to dig a hole about one foot deep, fill it with water, and watch how fast it drains. If the water is gone in a few hours, you have good drainage. If it sits for more than a day, you have a drainage problem and will need to amend heavily with organic matter or consider raised beds.
In poorly drained sites, the tree's shallow roots stay waterlogged, and the combination of wet soil and fungal pressure from the soil leads to disease. Prevention is far easier than treatment, so get this right before planting.
Materials and Preparation
Before you amend your soil, gather these materials:
- Finished compost or aged composted bark (2 to 3 bags for a single planting hole)
- Peat moss or coconut coir (1 to 2 bags)
- Perlite or coarse sand for drainage improvement (optional, but helpful in clay-heavy soils)
- Soil pH test kit (optional, but recommended)
- Sulfur or lime, only if your pH test shows need (follow product instructions for dosing)
- Mulch for after planting (pine needles, shredded bark, or aged wood chips)
Do not use fresh manure, as it can burn roots and introduce pathogens. Composted or aged materials only.
Step-by-Step Soil Amendment Process
- Test your soil pH and drainage. Use a simple pH test kit on a sample from the planting area. Dig a test hole 12 inches deep, fill it with water, and time how long it drains. Record both results so you know what you are working with.
- Adjust pH if needed, 6 to 12 months ahead. If your test shows pH above 6.5, mix sulfur into the top 6 to 8 inches of soil at the rate recommended on the package. If pH is below 5.5, add lime the same way. Wait several months for the adjustment to take hold. If you are planting soon, proceed with minor amendments and plan a pH correction after one growing season.
- Prepare the planting hole. Dig a hole twice as wide as the root ball of your Crimson Queen and just as deep. The goal is to give roots room to spread into amended soil without them hitting untouched native soil immediately.
- Mix your amendment blend. In a pile or large container, combine your native soil (removed from the hole) with compost or aged bark (40 to 50 percent by volume), peat moss or coir (20 to 30 percent), and if your soil is heavy clay, perlite or coarse sand (10 to 20 percent). Mix thoroughly. This ratio creates a rich, airy blend that holds moisture without becoming waterlogged.
- Backfill the planting hole. Place the tree in the hole at the same depth it was in its nursery container (not deeper, which invites root collar rot). Fill the hole halfway with your amended soil, water gently to settle it, then fill the rest of the way. Do not tamp hard. Gentle settling with water is better.
- Apply mulch. Spread 2 to 3 inches of pine needles, shredded bark, or aged wood chips over the soil around the base, keeping it a few inches away from the trunk. Mulch stabilizes soil temperature and moisture, which is especially important for young trees.
- Water deeply after planting. Soak the amended area until the soil is visibly moist a few inches down. This final watering settles the amendments and eliminates air pockets that can dry out roots.
Tips to Avoid Common Soil Mistakes
Planting too deep: If the tree sinks below its original soil level or the root collar ends up buried, roots stay too wet and the tree declines. Plant at the same depth every time.
Using heavy clay without amendment: Clay alone will compact within a year or two, negating your amendment work. If you have clay, the organic matter content has to be significant, not just a thin layer on top.
Ignoring drainage in low spots: If your yard slopes and water pools in the planting area after rain, no amendment will fix it. Either plant on higher ground or build a raised bed.
Overfeeding: A rich, amended soil usually has enough nutrients for the first year. Avoid high-nitrogen fertilizers, which push weak, soft growth. If you fertilize, use a balanced, slow-release product in early spring only.
Letting the soil dry out completely: Crimson Queen needs regular moisture. In drought, its leaves scorch and do not recover that season. Inconsistent watering is one of the top killers of Japanese maples in home gardens.
Expected Results
Within the first growing season, a Crimson Queen planted in properly amended soil should show steady growth (roughly 6 to 12 inches per year), consistent deep red-purple foliage, and no signs of stress like leaf scorch or yellowing. If the tree looks thin, pale, or develops brown leaf edges early in summer, this usually points to a soil or watering issue, not a pest.
Over time, as organic matter breaks down and the soil settles, you can maintain the rich loam by top-dressing with compost every two to three years. This keeps the soil structure open and feeds the tree gradually without the shock of heavy fertilizer.
Crimson Queen can reach 8 to 10 feet tall and 10 to 12 feet wide over 15 to 20 years in ideal conditions. Poor soil delays this timeline and keeps the tree smaller and less vigorous. Good soil is an investment that pays dividends for decades.
Quick Reference: Soil Requirements Checklist
| Requirement | Target Specification | Why It Matters |
|---|---|---|
| Soil Type | Rich, well-drained loam | Balances moisture retention and airflow |
| Organic Matter Content | 40-50% compost or aged bark | Keeps soil loose and buffers moisture |
| Soil pH | 5.5-6.5 (slightly acidic to neutral) | Ensures nutrient availability; prevents iron chlorosis |
| Drainage | Water drains within a few hours, not pooling | Prevents root rot and fungal disease |
| Planting Depth | Same as nursery container | Avoids root collar rot and waterlogging |
| Mulch Layer | 2-3 inches, kept back from trunk | Stabilizes soil moisture and temperature |
| Moisture During Growth | Regular, consistent; never completely dry between waterings | Prevents leaf scorch and stress |
For a complete guide to caring for your Crimson Queen after planting, including pruning, fertilizing, and troubleshooting pests and diseases, see Crimson Queen Japanese Maple Care: The Complete Growing Guide.