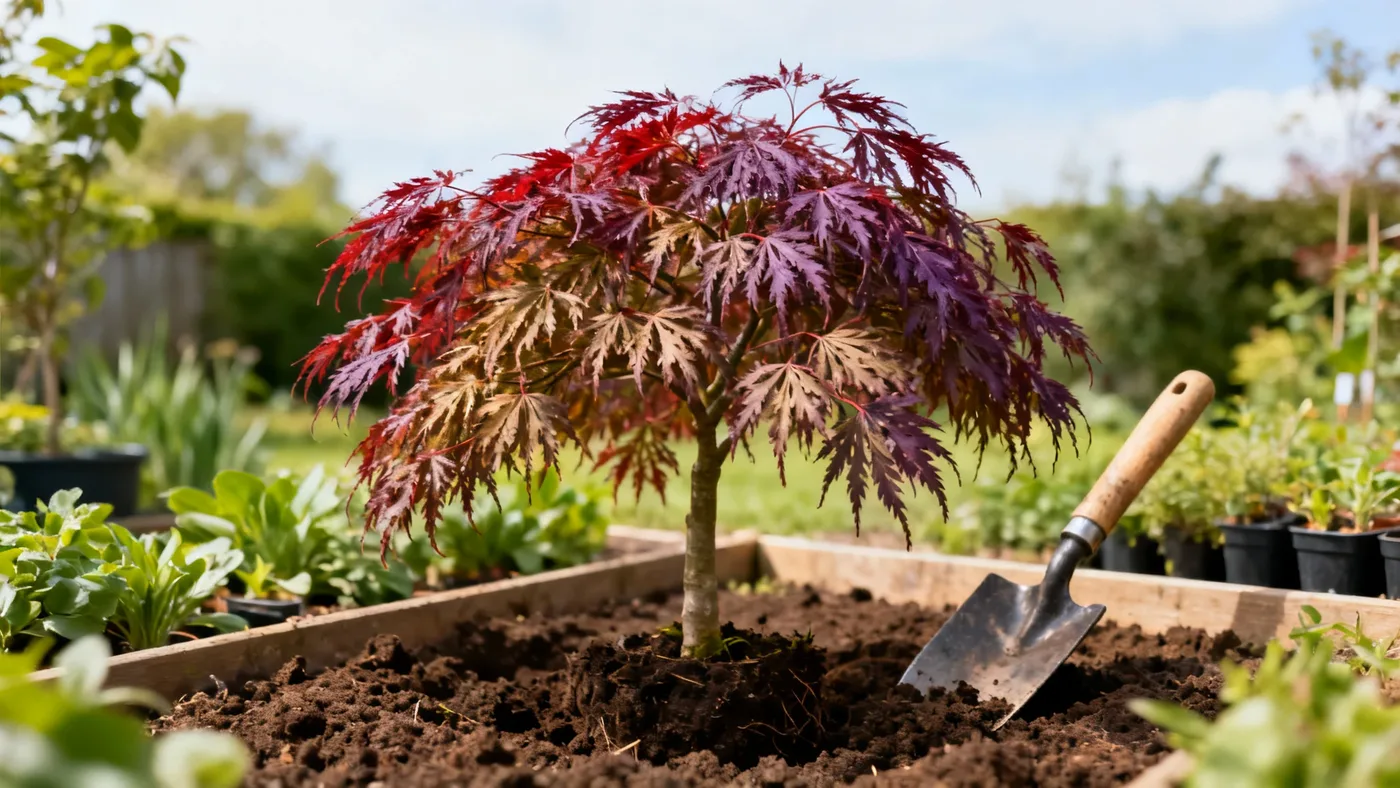
How to Plant a Crimson Queen Japanese Maple the Right Way
The Crimson Queen Japanese Maple is a show-stopper. Its finely dissected, lacy leaves emerge deep red-purple in spring and turn brilliant crimson to scarlet in fall. The graceful weeping form rewards you with years of visual interest, even in winter when bare branches create a stunning silhouette. But this beauty demands the right planting approach. Get the location, soil, and initial care right from the start, and your tree will settle in and thrive for decades. Rush it or overlook the details, and you'll spend years coaxing it back to health.
When to Plant a Crimson Queen Japanese Maple
Timing matters. Plant in early spring or early fall, avoiding peak summer heat. Spring planting (as soon as the ground can be worked) gives the tree the full growing season to establish roots before winter. Fall planting (before hard frosts arrive) allows roots to settle in the cooler season, but the tree enters dormancy before pushing much new growth, so it waits until spring to show vigor.
Summer planting is risky. High heat stresses young roots before they have time to develop, and you'll spend weeks watering heavily to keep the soil from drying. If you find a tree you love in mid-June, hold off and plant it in late August or September instead.
Winter planting in zones 5-6 is possible if the ground isn't frozen, but not ideal. The tree won't establish meaningful roots until spring, and harsh winter winds can desiccate the foliage of younger plants. Stick to early spring or fall for the best odds.
Choosing the Right Location
Crimson Queen Japanese Maples grow in full sun to partial shade. In cooler climates (zones 5-7), they tolerate and even prefer full sun. In hotter regions (zone 8, and especially zone 9 with afternoon shade), afternoon shade is beneficial to prevent leaf scorch, that papery browning of leaf edges that happens when sun intensity combines with heat and dry soil.
Check your local climate. If summer temperatures regularly exceed 90 degrees Fahrenheit and humidity is low, plan for afternoon shade. Morning sun and dappled afternoon light is the sweet spot. Under dense shade, growth slows further and the red color may pale slightly.
Wind matters. The deeply cut leaves are delicate and large-surfaced. A location exposed to strong, constant wind will damage foliage and stunt growth. Place your tree where it has some shelter from afternoon gusts, especially in windy sites near open fields or coastal areas. A windbreak of other plants or structures helps.
Avoid planting directly under eaves or where roof runoff will concentrate. The combination of heavy water and soil compaction harms fine root systems.
Soil Preparation and Site Assessment
Crimson Queen Japanese Maples are not flexible about soil. They need rich, well-drained loam high in organic matter, with a soil pH of about 5.5 to 6.5 (slightly acidic to neutral). They hate soggy, compacted, or clay-heavy soil, and they don't thrive in alkaline conditions.
Test your soil before digging. Collect samples from the planting area and send them to your local extension service or use an at-home test kit. Results will tell you pH and organic matter content. If your pH is above 7.0, acidify gradually with sulfur applied according to test results. If it's below 5.5, add lime. Adjusting pH takes time, so do this in the season before planting if possible.
Soil structure is just as important as pH. Clay-heavy or compacted soil needs amendment. If you press a handful of moist soil and it forms a tight ball that doesn't crumble, you have too much clay. If it falls apart immediately, it's sandy and won't retain moisture well.
For heavy or poor soil, plan to amend the planting area substantially. This is worth doing right.
Materials and Tools You'll Need
- A Crimson Queen Japanese Maple plant (usually sold in quart, #1, or #3 containers from a nursery)
- A sharp spade or shovel
- Pruning shears
- Compost or composted bark, aged 2-3 years old
- Peat moss or coco coir (optional, for sandy soils)
- Soil sulfur (if acidifying) or horticultural lime (if raising pH)
- A watering can or soaker hose
- Mulch (wood chips or bark, not rubber)
- A tape measure to check spacing
- A soil test kit or contact information for your extension service
Step-by-Step Planting Instructions
Step 1: Prepare the Planting Area
Clear the planting area of grass, weeds, and debris. Make sure you have at least 8-12 feet of clear space on all sides for the tree's mature width. It will reach 10-12 feet wide and 8-10 feet tall over 15-20 years, so don't underestimate the space it needs.
If your soil is heavy clay or compacted, loosen the top 18-24 inches with a spade. Break up clods. Don't till vigorously, as this can damage soil structure and bring up deeper, less fertile layers.
Step 2: Dig the Planting Hole
The hole should be two to three times wider than the root ball of your plant, but no deeper. A common mistake is digging a hole deeper than the root ball, which causes the tree to sink after planting as soil settles. Instead, measure the height of your pot. Dig until the ground level in the hole matches the original soil line on the tree.
For a #1 container (the most common size), expect a hole about 18-24 inches in diameter and roughly 12-18 inches deep, depending on pot height. For a #3 container, dig wider and proportionally deeper.
Step 3: Amend the Backfill Soil
Mix the soil you removed from the hole with compost or aged composted bark. A good ratio is one part compost to two or three parts native soil. If your soil is particularly dense or poor, go closer to 50 percent compost. Compost improves drainage, adds organic matter, and creates a softer root zone for establishment.
Blend this mixture thoroughly. You're creating a transitional soil that connects your native soil to the backfill without shocking the roots.
Step 4: Remove the Tree from Its Container
Water the tree well a few hours before planting. Gently remove the pot, supporting the root ball with your hands. If the plant is root-bound (roots spiraling tightly around the soil), gently tease apart the outer roots with your fingers or make three to four vertical score marks with a knife from top to bottom of the root ball. This encourages roots to spread outward into the surrounding soil rather than continuing to spiral.
Do not prune roots unless they are actively girdling the root ball (circling so tightly that they strangle the trunk). Minor spiraling roots will straighten as the tree grows and roots spread.
Step 5: Set the Tree in the Hole
Place the tree in the center of the hole so the top of the root ball sits level with the surrounding ground. Have a helper hold it steady while you step back and check that it's upright and centered. This is important. A tree leaning from the start will grow tilted.
Avoid planting too deep. The base of the trunk (the root flare, where roots begin to spread) should sit at or very slightly above ground level. Planting too deep suffocates roots and invites rot and girdling root problems later.
Step 6: Backfill and Water
Fill the hole halfway with your amended soil mixture, firming gently with your hands to eliminate air pockets. Do not stomp or pack hard. Then water thoroughly until the soil is muddy and water pools slightly at the surface. This settles the soil and eliminates remaining air gaps.
Finish filling the hole to ground level with the remaining amended soil. Water again deeply. The soil should be moist all the way down but not waterlogged.
Step 7: Apply Mulch
Apply 2-3 inches of wood chips or bark mulch around the base of the tree, extending it out to about 18-24 inches from the trunk. Leave a 2-3 inch gap between the mulch and the trunk to prevent rot and pest issues. Never pile mulch against the bark.
Mulch moderates soil temperature, retains moisture, and keeps weeds down. Replace it annually as it breaks down.
Step 8: First Season Care
Water consistently for the first year. Your goal is steady, even moisture. Check the soil an inch below the surface with your finger. If it feels dry, water. Depending on rainfall and climate, this may mean watering one to three times per week in the growing season.
Avoid waterlogging. Soil should be moist, not soggy. Poor drainage is worse than occasional dryness.
Do not fertilize at planting time. Wait until the following spring, when growth resumes. In early spring of year two, apply a light application of balanced, slow-release fertilizer (something like 10-10-10 or 12-4-8). Avoid high-nitrogen feeds, which push weak, tender growth susceptible to damage.
Common Mistakes to Avoid
Planting too deep. This is the biggest mistake. Even an inch too deep can lead to girdling roots and poor establishment. The root flare must sit at ground level.
Planting in heavy, un-amended soil. If you skip soil preparation because you're in a hurry, you'll regret it for years. Amending takes an afternoon and changes everything.
Overwatering. Japanese Maples like consistent moisture but not wet feet. Soggy soil invites root rot. Water deeply and then let the soil dry out slightly before watering again.
Full sun in zone 8 or hotter climates. Afternoon shade protects foliage from scorch and reduces transplant stress. This is not optional in the Deep South.
Poor wind site selection. A windy, exposed location will beat up the delicate foliage year after year. Choose shelter if you have the option.
Fertilizing too early or too heavily. A newly planted tree doesn't need fertilizer. Wait a full year. Then use only light applications of balanced fertilizer in early spring. Heavy feeding pushes weak growth.
Expected Results and Timeline
The Crimson Queen Japanese Maple grows slowly, roughly 6-12 inches per year. Don't expect a mature landscape tree overnight. Over 10-15 years, you'll see it settle into a graceful weeping form about 8-10 feet tall and 10-12 feet wide. By 15-20 years, it will reach near-full maturity.
In the first year, focus on establishment. The tree will put energy into roots rather than flashy top growth. In year two and beyond, you'll see fuller canopies and stronger branch structure. Fall color typically improves with age as the tree matures and its root system deepens.
For a deeper dive into ongoing care and seasonal maintenance, see our complete Crimson Queen maple care guide.
Quick Reference: Planting Checklist
| Task | Timing | Key Detail |
|---|---|---|
| Soil test | Before planting season | Aim for pH 5.5-6.5; adjust 6 months ahead if possible |
| Choose location | Before planting | Full sun to part shade; afternoon shade in zone 8; 8-12 ft clearance |
| Dig hole | Planting day | 2-3 times wider than root ball; same depth |
| Prepare backfill | Planting day | 1 part compost to 2-3 parts native soil |
| Plant tree | Early spring or early fall | Root flare at ground level; water after backfilling |
| Apply mulch | Planting day | 2-3 inches; 2-3 inch gap from trunk |
| Water regularly | First year | Consistent moisture; avoid waterlogging |
| First fertilizer | Early spring, year two | Light application of balanced, slow-release fertilizer |