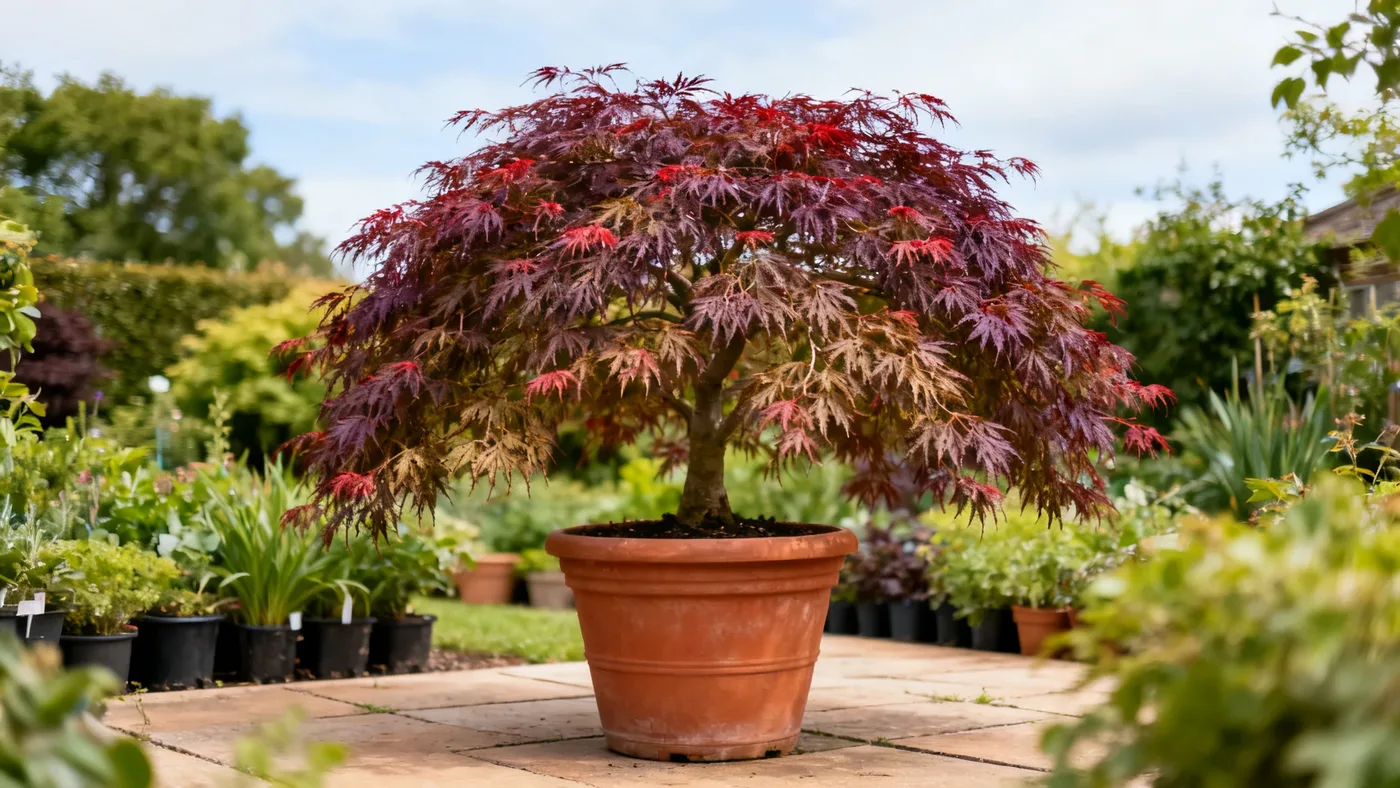
Growing Crimson Queen Japanese Maple in a Container or Pot
A potted Crimson Queen Japanese Maple brings year-round color and graceful form to patios, decks, and small gardens. Unlike their in-ground cousins, container-grown Crimson Queens remain more compact and manageable, making them ideal for home gardeners with limited space or those in rental situations. Growing Japanese maple in containers is entirely feasible when you choose the right pot, soil mix, and care routine.
Why Container Growing Works for Crimson Queen
Crimson Queen is well suited to large containers with good drainage. The plant's naturally weeping habit and slow growth rate (roughly 6 to 12 inches per year) mean it stays at a manageable size in a pot for many years. Potted specimens also give you control over soil composition and watering, two factors that are crucial for this cultivar's success.
A Crimson Queen in a container will remain somewhat smaller than its in-ground counterpart, which typically reaches 8 to 10 feet tall and 10 to 12 feet wide over 15 to 20 years. In a large container, you can expect the plant to stay in the 4 to 6 foot range for several years, with graceful cascading branches.
Selecting the Right Container and Drainage
Container size matters. Start with a pot that is at least 15 to 20 inches in diameter for a nursery-grown young plant (typically a #1 or #3 container size). As the plant grows over the next few years, you may repot it into something slightly larger, up to 24 to 30 inches in diameter for a more mature specimen. The pot must have drainage holes on the bottom, with no reservoirs that trap water around the roots.
Material options include terracotta, fabric grow bags, or wooden boxes lined with landscape fabric. Terracotta offers good airflow and aesthetics but dries faster, especially in warm climates. Fabric pots keep roots slightly cooler and prevent root circling. Avoid solid plastic pots without drainage or those designed for purely decorative display with no drainage mechanism.
Elevation is important. Place your container on pot feet or risers so air can flow underneath and water drains completely away. This small step prevents root rot, one of the most common problems with container-grown Japanese maples.
Preparing Your Soil Mix
Crimson Queen requires rich, well-drained loam high in organic matter. Do not use standard garden soil, which compacts in pots and retains too much moisture. Instead, blend a custom mix:
- 50 percent high-quality potting soil or aged bark fines
- 30 percent compost or well-rotted leaf mold
- 20 percent perlite or coarse sand for additional drainage
The target soil pH is slightly acidic to neutral, around 5.5 to 6.5. If your tap water is hard or alkaline, consider using rainwater for watering, which naturally lowers pH over time.
Planting Your Crimson Queen in a Container
Plant in early spring or early fall, avoiding peak summer heat. Follow these numbered steps:
- Fill the bottom of your container with 2 to 3 inches of your soil mix, creating a slight mound in the center. This ensures the roots sit at the proper depth and water does not pool around the trunk.
- Remove the Crimson Queen from its nursery pot by gently loosening the root ball with your fingers. If roots are circling tightly (girdling roots), carefully tease them outward with your fingertips. Do not force or tear them.
- Position the plant in the container so that the top of the root ball aligns with the rim of the pot. The soil level should not bury the trunk flare; the base of the tree should remain visible above the soil line.
- Fill around the root ball with your prepared soil mix, pressing gently to eliminate air pockets. Do not compact the soil heavily; gentle pressure is enough.
- Water thoroughly until water drains from the bottom holes. This settles the soil and removes remaining air gaps without creating a soggy environment.
- Apply 1 to 2 inches of mulch (shredded bark or compost) around the base, staying 2 inches away from the trunk. Mulch helps regulate soil moisture and temperature.
Do not fertilize immediately after planting. Wait until the following spring when new growth appears.
Watering Your Potted Crimson Queen
Consistent moisture is critical. The soil should feel slightly damp when you touch it 1 to 2 inches below the surface, but never waterlogged. In warm weather or during active growth (spring and early summer), you may need to water every 2 to 3 days. In cooler months or dormancy (fall and winter), water less frequently, roughly weekly or when the top inch of soil feels dry.
Container soil dries out faster than in-ground soil, especially in terracotta pots or hot climates. Check your pot daily during the growing season. If the foliage starts to droop slightly or curl, water immediately. Waiting too long can stress the plant and trigger leaf scorch or dropped leaves.
Avoid overhead watering in the heat of the day; instead, water at the soil level early in the morning or in the evening. This reduces fungal issues and prevents the delicate foliage from scorching.
Feeding and Light Pruning
In spring, apply a light application of balanced, slow-release fertilizer (such as a 10-10-10 formulation) according to package instructions. Avoid high-nitrogen feeds, which push weak, soft growth. A single spring feeding is usually sufficient; do not fertilize in summer or fall.
Crimson Queen requires full sun to partial shade. In hot-summer regions (USDA zones 8 and 9), afternoon shade is beneficial to prevent leaf scorch. In cooler zones (5 to 7), full sun encourages the deepest red color. If your container sits in afternoon sun in a very hot climate, you may notice some leaf edges browning slightly; move it to a spot with dappled afternoon shade.
Pruning in containers is minimal. Remove only dead, crossing, or downward-growing interior branches in late fall through midwinter dormancy. Avoid heavy pruning; the natural cascading form is the plant's greatest asset.
Winter Care for Container-Grown Plants
In USDA zones 5 to 7, container-grown plants need extra winter protection because roots in pots are more exposed to freezing temperatures than in-ground plants. After the first frost, move your container to a sheltered location such as a north-facing wall or under eaves, where it is protected from harsh winds and direct winter sun.
Wrap the pot itself with bubble wrap or burlap to insulate the root zone. The top of the plant can tolerate dormancy and some dieback on younger specimens in colder zone 5 sites, but protecting the roots is key to survival.
In zones 8 and 9, container protection is less critical, but moving the pot to a spot with morning sun and afternoon shade during winter is still helpful. Water less frequently in winter, but do not let the soil dry out completely; dormant plants still need some moisture.
Common Mistakes and How to Avoid Them
Overwatering: This is the leading cause of root rot in container maples. Always check soil moisture before watering. If in doubt, wait another day. The soil should never sit soggy.
Using poorly draining soil: Generic potting soil mixed with garden soil or clay will compact and stay wet too long. Use the recipe provided above, or purchase a premium Japanese maple soil mix if available.
Choosing a pot too small: A pot that is too small dries out too quickly and forces frequent watering, stressing the plant. Start with at least a 15 to 20 inch diameter container and plan to repot every 2 to 3 years as the plant grows.
Ignoring winter root protection in cold zones: Roots freeze more easily in containers than in the ground. Wrapping the pot and moving it to a sheltered location significantly improves survival, especially for younger plants.
Placing the container in full afternoon sun in hot climates: Even though Crimson Queen enjoys light, intense afternoon heat can scorch the delicate foliage. Provide dappled afternoon shade in zones 8 and 9.
What to Expect from Your Container Maple
A healthy Crimson Queen in a large container can remain attractive for many years with proper care. The plant emerges with red-purple foliage in spring, may bronze-green slightly during intense summer heat or sun, and develops brilliant crimson to scarlet red fall color. Winter reveals the graceful, cascading branch structure after leaves drop.
Your potted maple should grow at a slow rate (about 6 to 12 inches per year), which means it stays manageable for a long time. Many gardeners report that their container-grown Crimson Queens remain in the 4 to 6 foot range for 5 to 10 years without aggressive pruning or repotting.
For more detailed information on year-round care, see our complete growing guide. To learn about the plant's full potential size in the ground, check out our guide on mature height and width.
Container Care Quick Reference
| Task | Timing | Notes |
|---|---|---|
| Select and prepare pot | Before planting | 15-20 inch diameter minimum, drainage holes, raised on feet |
| Plant the maple | Early spring or early fall | Avoid peak summer heat; keep trunk flare above soil |
| Check soil moisture | Daily during growing season | Soil 1-2 inches below surface should feel slightly damp |
| Water thoroughly | Every 2-3 days in warm weather; weekly or less in cool months | Water at soil level, avoid overhead watering in afternoon |
| Apply balanced fertilizer | Early spring once | Slow-release, 10-10-10 or similar; avoid high-nitrogen |
| Prune for shape | Late fall to midwinter dormancy | Remove only dead or crossing branches; keep natural form |
| Provide afternoon shade | Spring through summer in zones 8-9 | Prevents leaf scorch in hot climates |
| Wrap pot for winter | After first frost in zones 5-7 | Bubble wrap or burlap around pot; move to sheltered location |
| Reduce winter watering | Fall through early spring | Check soil; do not let it dry completely but do not overwater |
| Repot or refresh soil | Every 2-3 years in early spring | Use the same soil mix recipe; choose a slightly larger pot if needed |