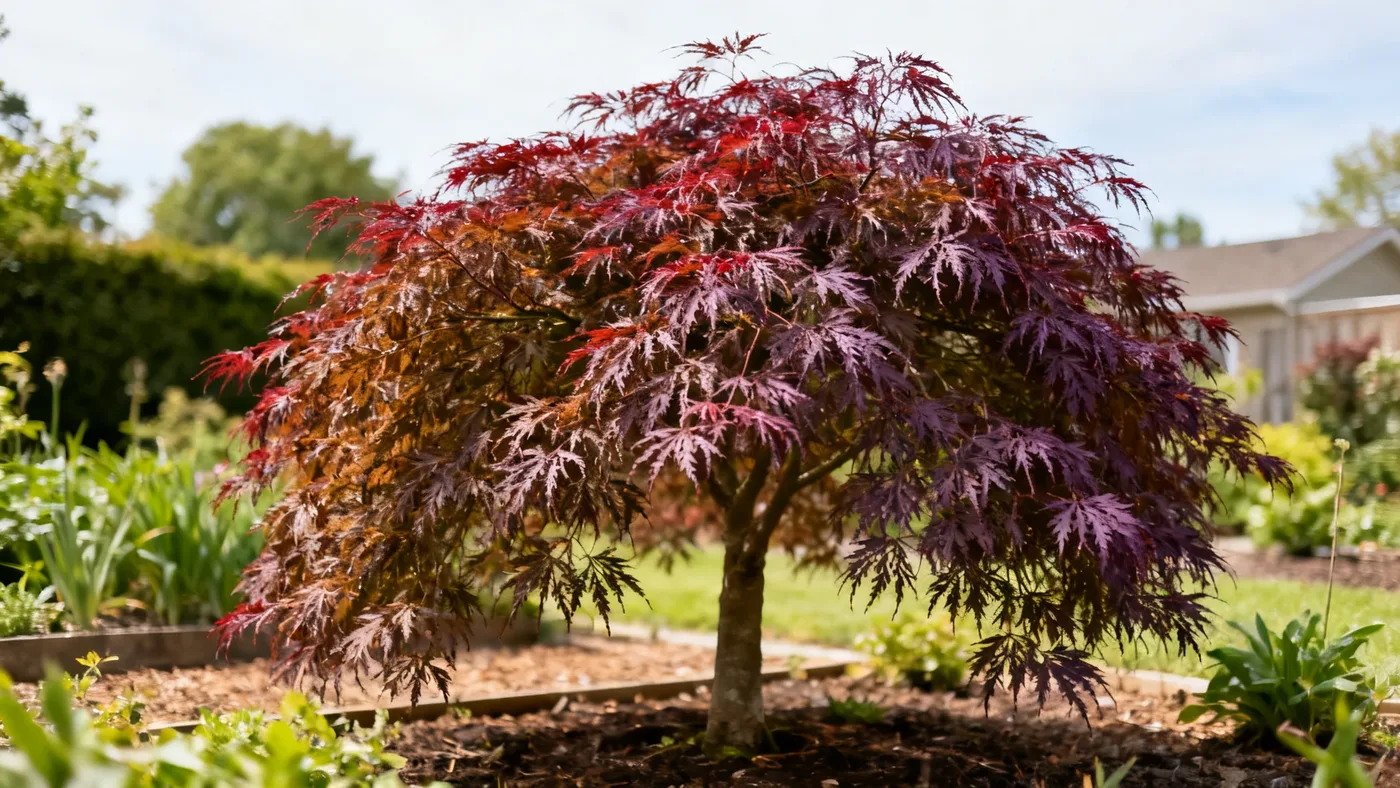
Pruning a Crimson Queen Japanese Maple Without Ruining the Shape
Crimson Queen Japanese Maple is one of those plants that can tempt you to do too much. The cascading branches and delicate foliage make it look like a sculpture that needs constant fiddling, but here's what I've learned after years of growing these: restraint is your best tool. Pruning Crimson Queen Japanese Maple is mostly about removing what shouldn't be there, not about reshaping what is. The plant's naturally graceful weeping form does most of the work for you. The right pruning approach actually preserves that shape, while heavy-handed cutting can turn a beautiful specimen into a leggy, awkward plant that takes years to recover.
This guide walks you through when to prune, exactly what to cut, and how to avoid the mistakes that leave your maple looking more bush than tree.
When to Prune Crimson Queen Japanese Maple
Timing matters more than technique. Prune Crimson Queen Japanese Maple in late fall to midwinter, when the plant is fully dormant. This window typically runs from November through February in most growing zones. Dormancy pruning reduces bleeding from fresh cuts and lets the plant heal before spring growth pushes through.
Why avoid summer and early fall pruning? New cuts made during active growth cause the plant to bleed sap excessively, which stresses the tree and can invite pests and disease. Spring pruning before buds break also risks frost damage to tender new growth if cuts expose inner branches. The only exception is removing obviously dead wood, which you can do anytime it becomes visible.
If your Crimson Queen is in USDA zones 5 through 8, you have the full winter dormancy window to work with. Gardeners in zone 9 (with afternoon shade) should prune earlier in fall before the coldest weeks arrive, since winter damage recovery matters more in warmer climates where the tree stays semi-active. Check your local extension service for your specific zone timing if you're near a zone boundary.
Materials and Tools You'll Need
Good pruning starts with sharp, clean tools. Dull blades crush bark and create ragged wounds that heal poorly. Here's what to have on hand before you start.
- Bypass hand pruners (6 to 8 inches): Use these for branches under 3/4 inch thick. Bypass pruners (where one blade slides past a fixed blade) cut cleaner than anvil-type pruners. Look for ones with curved blades that fit the natural growth angles of weeping branches.
- Loppers (18 to 24 inches): These extend your reach and give more leverage for branches up to 1.5 inches thick. The longer handles matter more than raw strength when you're working on a weeping tree.
- Pruning saw (curved blade, 6 to 8 inches): For anything thicker than 1.5 inches. A folding saw keeps you safe and gives better control on delicate branching patterns than a bow saw.
- Pruning sealer or wound dressing: Optional, but helpful. Japanese maples respond well to a thin coat of pruning sealer on larger cuts. It's not essential, but it can reduce disease risk and helps the tree compartmentalize wounds more quickly.
- Isopropyl alcohol or bleach solution (10 percent bleach to water): Wipe tool blades between cuts to avoid spreading disease, especially if you prune multiple trees or notice any sick branches.
- Gloves and safety glasses: Thin, dexterous gloves let you guide branches while cutting, and glasses protect your eyes from twigs as you work on an overhead tree.
Step-by-Step Pruning Instructions
Pruning a weeping Japanese maple follows three categories: remove dead wood, eliminate crossing branches, and take out downward-growing interior shoots. These three moves alone preserve the graceful form while keeping the plant healthy.
Step 1: Identify Dead Wood
Start by walking around the tree and looking for branches that are obviously brown or brittle. Scratch the bark lightly with your fingernail. If you see green underneath, the branch is alive. If it's brown all the way through, it's dead. Dead wood won't recover, so remove it entirely back to the nearest living lateral branch or to the branch collar (the swollen area where the dead limb connects to a healthy one).
This step alone can account for 30 to 50 percent of the work on an older tree. Dead branches happen from winter dieback, disease stress, or simple age. Removing them does two things: it opens up the canopy to light and air circulation, and it prevents the weight of dead wood from dragging down otherwise healthy branches.
Step 2: Remove Crossing or Rubbing Branches
Look for branches that cross over each other or rub together in the wind. These create wounds and compete for the same growing space. When two branches cross, remove the weaker one or the one growing in an awkward direction. With Crimson Queen, that typically means keeping the branch that cascades naturally and removing the one that juts upward or inward.
Make your cuts close to the branch collar, not flush against the trunk. The branch collar is the slightly thickened ring of bark where the branch connects. Cutting just outside it (leaving about a quarter inch of the collar) helps the tree heal faster than cutting flush or leaving a long stub. Flush cuts damage the plant's wound-compartmentalization process, while long stubs take years to close over.
Step 3: Thin Out Downward-Growing Interior Shoots
This step is where most home gardeners go wrong. The natural weeping form of Crimson Queen depends on outer branches cascading down, not on dense interior branching. Look inside the canopy for small shoots that grow downward or inward. These don't follow the plant's elegant weeping pattern and can create a tangled, congested interior.
Remove these interior shoots back to the branch they originate from. You're not trying to open a huge hole, just thinning out enough so light can reach deeper into the canopy. If you hold the branches up and can see through them, you've done it right. If you're cutting heavily, you've cut too much. Crimson Queen grows at a slow rate, roughly 6 to 12 inches per year, so it needs all the foliage it has to keep developing properly.
Step 4: Step Back and Look
After each major section, step back 10 feet and evaluate. The shape should look lighter and more open than before, but still fully clothed. The cascading branches should still flow downward. If the tree looks sparse or loses its weeping silhouette, you've removed too much. The good news: Crimson Queen rarely needs repeat pruning in the same season, so you can walk away, observe for a day, and come back if you missed something obvious.
Step 5: Clean Up and Seal Large Wounds
Gather all pruned material and remove it from the site. If you made any cuts larger than 1 inch in diameter, consider applying a thin coat of pruning sealer or wound dressing to help the tree compartmentalize the wound. Don't seal small cuts, which heal fine on their own. Wipe your tools with alcohol or diluted bleach before storing them to keep them clean for next season.
Tips to Avoid Common Pruning Mistakes
Don't shear the tree into a ball or pyramid. Crimson Queen is grafted onto Acer palmatum rootstock specifically to maintain its weeping form. If you use hedge shears and try to shape it like a formal hedge, you'll destroy the graft's whole purpose. Remove individual branches, never shear the whole canopy. Think "surgery" not "haircut."
Don't remove the lower branches. The weeping form of this cultivar depends on long, cascading lower branches. Cutting these off leaves you with a tall stem and no character. If lower branches are damaged, try to repair them. If they're beyond saving, leave them be and let new interior shoots develop over time.
Don't over-prune a young tree. Trees under 3 to 4 years old are still establishing their root system and shouldn't be pruned heavily. Light removal of dead wood is fine, but major shaping should wait until the plant is more established. Crimson Queen takes 10 to 15 years to reach full landscape size anyway, so patience now pays off later.
Don't ignore the branch collar. Cutting too close to the trunk or too far from it both slow healing. The branch collar has specialized healing tissue that compartmentalizes the wound. Respect it, and your tree heals faster and gets sick less often.
Don't fertilize right after pruning. Wait until spring growth begins before feeding the tree. Fresh pruning wounds are vulnerable, and high nitrogen fertilizers can push weak, tender growth that easily breaks or burns in sun.
Expected Results and Timeline
After pruning in late fall or winter, your Crimson Queen may look noticeably lighter for a week or two. This is normal. As spring approaches and dormancy breaks, you'll see new growth filling in the canopy by April or May. The plant typically responds with denser foliage by mid-summer, and any wounds from large cuts close over gradually through the growing season.
The full visual recovery from significant pruning typically takes one full growing season. A heavily pruned tree may take two seasons to regain its full graceful form. This is why light, consistent pruning every 2 to 3 years is better than waiting 5 years and then removing a lot at once. Small annual adjustments keep the plant healthy and looking its best without the risk of overshaping.
Quick Reference Checklist
| Pruning Task | Timing | Tool | Cut Size Limit |
|---|---|---|---|
| Dead wood removal | Anytime (best: late fall to winter) | Pruners or loppers | No limit (remove entirely) |
| Crossing branches | Late fall to midwinter dormancy | Loppers or pruning saw | Up to 1.5 inches |
| Interior downward shoots | Late fall to midwinter dormancy | Hand pruners or loppers | Under 1 inch |
| Shaping/heavy pruning | Not recommended on Crimson Queen | N/A | N/A |
| Disease branch removal | As observed year-round | Pruners or saw | No limit |
For more on maintaining your Crimson Queen year-round, read our complete care guide covering watering, feeding, and seasonal care. If you're starting with a young plant, our planting guide explains how to get the foundation right so your tree develops strong structure from the start.